If you’ve ever picked up a candle and thought, “Wait… what is this wax actually made from?” — you’re not alone.
Because “wax” sounds like one simple thing, but in reality, candle wax can come from plants, petroleum, insects, and even animals. And where it comes from affects almost everything you care about: scent throw, burn time, soot, appearance, price, and how “natural” the candle really is.
So in this guide, I’m going to walk you through exactly where candle wax comes from, what the main types are, how they’re made, and how to read labels without getting tricked by vague marketing.
What Is Candle Wax, Technically?
At its core, candle wax is a fuel.
A candle doesn’t “burn the wick” as much as it burns the wax vapor that the wick pulls upward. When you light a candle:
- The flame melts the wax near the wick.
- The wick absorbs the melted wax (like a tiny straw).
- Heat vaporizes the wax.
- The vapor combusts and produces the flame.
So the wax you choose isn’t just filler. It’s the main fuel source that determines performance.
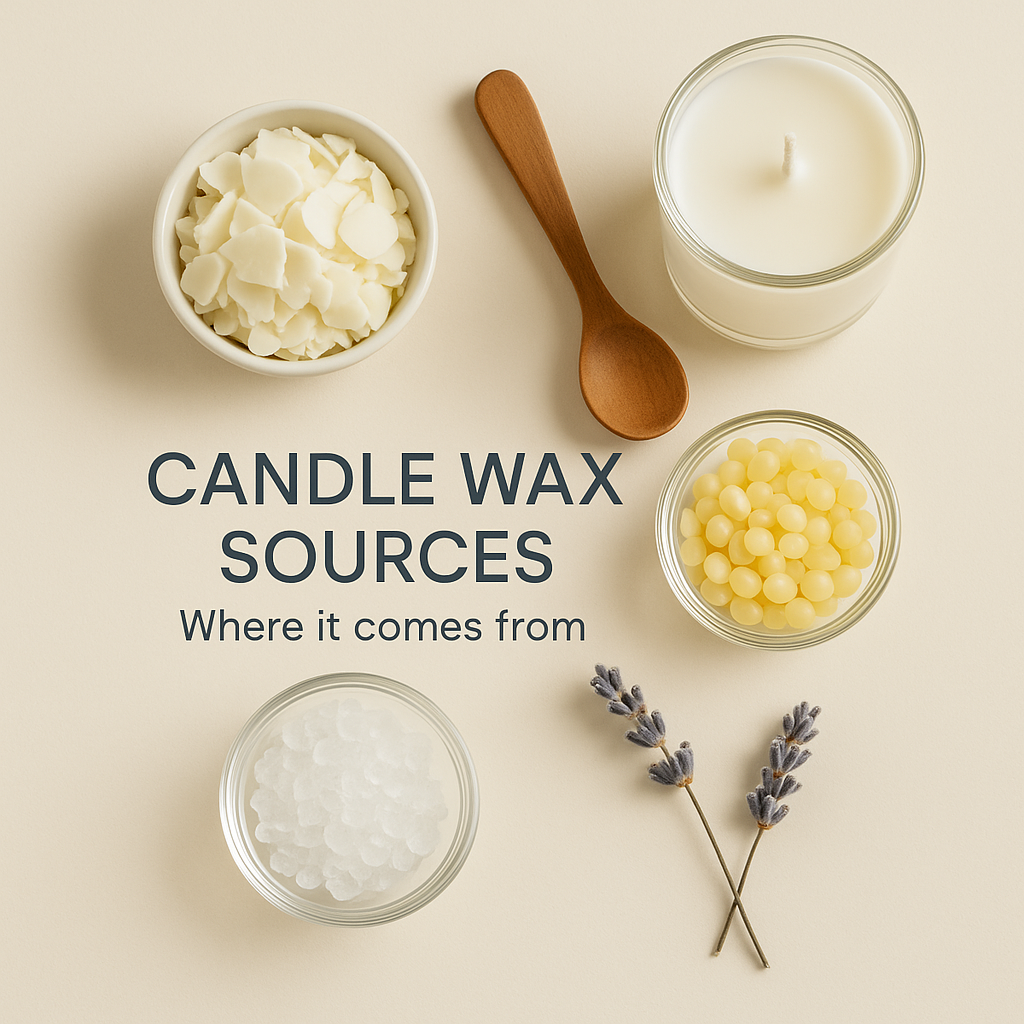
The Main Places Candle Wax Comes From
Almost all candle wax used today comes from one of these sources:
- Petroleum (mineral waxes) → paraffin, microcrystalline wax
- Plants (vegetable waxes) → soy, coconut, rapeseed/canola, palm, sunflower
- Bees (insect wax) → beeswax
- Animals (rendered fats) → tallow (less common today)
Some candles use a blend, like soy-paraffin, coconut-soy, or paraffin with additives.
Paraffin wax is the wax you’ve encountered most in mainstream candles for decades.
Where paraffin wax comes from
Paraffin is a byproduct of petroleum refining.
When crude oil is refined into fuels and lubricants, certain fractions can be further processed to isolate waxy hydrocarbons. Those are purified, de-oiled, and solidified into paraffin wax.
Why candle makers use it
Paraffin became popular because it’s:
- cheap
- easy to work with
- holds fragrance well
- capable of strong hot throw (scent when burning)
- available in many melting points and formulations
Common use cases
- scented jar candles
- pillars and votives (with the right formulation)
- mass-market candles
- many strongly scented candles
The controversy (and the reality)
Paraffin often gets framed as “bad” because it’s fossil-fuel derived. The truth is more nuanced:
- Paraffin is widely used and regulated in consumer products.
- Some paraffin candles can produce more soot if the wick is oversized, the candle is low quality, or you burn it in a draft.
- Well-made paraffin candles can burn cleanly, but quality varies a lot.
If you care about renewable sourcing, paraffin won’t fit that goal. But if you care about strong scent and affordability, it’s still common for a reason.
Soy wax became the “natural candle” poster child in the last 20–25 years, especially in the U.S.
Where soy ccandle wax comes from
Soy wax comes from soybean oil, which comes from soybeans. The basic steps look like this:
- Soybeans are harvested and cleaned.
- Beans are cracked and processed to extract soybean oil.
- The oil is hydrogenated (chemically altered) to make it more solid at room temperature.
- The result becomes flakes or pellets sold as “soy wax.”
So yes, soy wax is plant-derived — but it’s also typically processed, not “raw.”

Why soy is popular
- renewable (plant-based)
- typically burns slower than many paraffin blends
- generally produces less visible soot in many setups
- often marketed as cleaner, more eco-friendly
Tradeoffs you should know
Soy wax can be finicky:
- can have frosting (a white crystalline look)
- can struggle with very high fragrance loads depending on formula
- sometimes has weaker hot throw than paraffin (not always, but common)
- often performs best in containers, not pillars
Also: soy is sometimes blended with small amounts of paraffin or other additives to improve performance, and brands don’t always make that obvious.
Coconut wax has become a favorite in higher-end scented candles.
.jpg)
Where coconut wax comes from
Coconut wax is derived from coconut oil (from coconut meat). Like soy, it’s usually processed and often hydrogenated or fractionated to achieve a stable “wax” form.
Why coconut wax is loved
- smooth, creamy appearance
- excellent glass adhesion (often)
- can deliver strong scent throw
- burns nicely in many container candles
- often feels “luxury” in look and performance
The important detail: it’s usually blended
Pure coconut wax can be too soft. So many “coconut wax” candles are actually blends like:
- coconut + soy
- coconut + apricot
- coconut + small amounts of paraffin (sometimes)
This isn’t necessarily bad — blends often work better — but it’s worth knowing what you’re buying.
Rapeseed wax (often called canola wax in North America) is increasingly popular as a regional alternative to soy.
Where it comes from
It’s made from rapeseed oil/canola oil, processed into a solid wax through hydrogenation and refinement.
Why people choose it
- plant-based and renewable
- often locally grown in parts of Europe (lower transport footprint)
- good for container candles and some blends
- generally smooth, creamy tops with the right formulation
If you see “rapeseed wax candles” from European brands, it’s often because soy supply chains and sourcing preferences differ by region.
Palm wax can make beautiful candles — especially the ones with crystalline, feathered patterns.
Where palm candle wax comes from
Palm wax is derived from palm oil, produced from the fruit of oil palm trees. The oil is refined and processed into wax suitable for candles.
Why it’s used
- can create striking crystalline looks
- can be hard and good for pillars
- decent scent performance depending on blend
The big issue: sourcing
Palm oil is linked to major environmental concerns when sourced irresponsibly (deforestation, habitat loss). That doesn’t mean “all palm is evil,” but it does mean:
- you should look for RSPO-certified (or equivalent) responsible sourcing if a brand uses palm wax
- many consumers prefer alternative plant waxes due to palm’s reputation
Beeswax is one of the oldest candle materials in human history.
Where beeswax comes from
Bees produce wax from glands on their abdomen. Worker bees secrete wax scales and use them to build honeycomb cells.
Beeswax for candles typically comes from:
- cappings (thin wax covering honey cells)
- old comb (rendered and filtered)
- beekeeping byproducts
Why beeswax candles are special
- naturally aromatic (a mild honey scent)
- naturally golden (unless bleached/filtered to white)
- burns long and steady
- strong structure (great for tapers and pillars)
What to consider
- it’s usually more expensive than soy/paraffin
- scenting with fragrance oils can be trickier (many people enjoy it unscented)
- it’s not vegan (important to some buyers)
Also: “100% beeswax” is a specific claim. Some candles are “beeswax blend,” which can mean anything from mostly beeswax to a small percentage.

Before industrial waxes and modern supply chains, many households used tallow candles.
Where it comes from
Tallow is made by rendering animal fat (often beef or sheep). The rendered fat is purified and cooled into a solid.
Is it still used today?
Much less, but it exists in niche or historical reproduction candles. Some artisans experiment with it, but it’s not mainstream.
Pros and cons
- historically authentic
- can be inexpensive in certain contexts
But:
- can smell “fatty” or off if not refined well
- not vegan
- can smoke more in some formulations
Not all candle wax is a single clean ingredient.
Microcrystalline wax (also petroleum-derived)
Microcrystalline wax is refined from petroleum like paraffin, but its structure is different: it’s more flexible, sticky, and has a higher melting point.
Why it gets added
- improves flexibility and adhesion
- helps pillars hold shape
- can reduce frosting in some blends
- improves burn characteristics in certain designs
Other common additives you might see (or not see)
Depending on the maker, blends can include:
- stearic acid (often plant-derived, sometimes animal-derived)
- vybar (polymer additive used in paraffin to hold fragrance and reduce mottling)
- UV inhibitors
- hardeners/softeners
A candle label won’t always list these, which is why “100% soy” and “all natural” can be murky marketing phrases.
Why Candle Wax Source Matters (In Real Life)
Here’s how wax origin shows up when you actually use the candle.
1) Scent throw
- Paraffin: often strongest hot throw
- Coconut blends: often excellent
- Soy: can be great, but sometimes milder (depends heavily on formula + wick)
- Beeswax: naturally scented, usually not heavily fragranced
2) Burn time
- Soy and beeswax often burn slower than many paraffins
- Hard waxes (beeswax/palm) can last long in pillars/tapers
- Containers depend more on wick sizing than wax alone
3) Soot and cleanliness
Any candle can soot if:
- wick is too large
- you burn in drafts
- you don’t trim the wick
- fragrance load is too high for the system
But broadly, many people experience less visible soot with well-made soy/coconut/beeswax candles than with low-quality paraffin candles.
4) Sustainability / ethics
- Plant waxes are renewable, but farming practices matter
- Palm wax depends heavily on responsible sourcing
- Beeswax supports beekeeping but isn’t vegan
- Paraffin uses a fossil-based supply chain
The Truth About “Natural” Candle Wax Labels
This is where people get misled.
“Soy blend”
Could mean 90% soy + 10% paraffin… or 30% soy + 70% paraffin. There’s no universal standard.
“Vegetable wax”
Often means soy, palm, rapeseed, coconut, or a blend. But it’s intentionally vague.
“Clean burning”
Not a regulated term. A candle can be marketed as clean but still soot if wick/fragrance are mismatched.
“Non-toxic”
Also vague unless backed by actual testing claims, SDS transparency, and responsible fragrance sourcing.
If you want clarity, look for brands that explicitly state:
- wax type and whether it’s a blend
- wick type (cotton, wood, etc.)
- fragrance type (phthalate-free claims if relevant)
- sourcing (especially for palm)
How Wax Is Turned Into a Candle (Quick Overview)
Regardless of source, most candle wax goes through a similar “candle-making” journey:
- Refining/processing into a stable wax (flakes, slabs, pellets)
- Melting in controlled temperatures
- Adding fragrance and dye (if used)
- Pouring into containers or molds
- Wicking (or wicks are set beforehand)
- Curing (especially important for many soy and blend candles)
- Quality testing (burn tests, jar adhesion, scent throw)
This is why two candles that both claim “soy wax” can perform wildly differently: the wax may be similar, but formulation, wick, fragrance load, and curing make a huge difference.

Which Wax Is “Best”?
There’s no universal best wax — there’s a best wax for your goal.
If your priority is…
- Strong fragrance throw: paraffin or coconut blends often win
- Long burn + natural aroma: beeswax is hard to beat
- Plant-based and popular: soy or soy blends
- Regional, often lower transport in EU: rapeseed
- Pretty crystalline pillars: palm (ideally responsibly sourced)
- Budget-friendly scented candles: paraffin is common
A great candle is a system: wax + wick + fragrance + vessel + testing.
1) Is candle wax made from oil?
Sometimes, yes. Paraffin wax and microcrystalline wax are derived from petroleum (crude oil) through refining.
2) Is soy wax actually natural?
Soy wax is plant-derived, but it’s usually hydrogenated and refined to become solid and stable. It’s not “raw,” but it is commonly considered more natural than petroleum-based wax.
3) What is coconut wax made from?
Coconut wax is made from coconut oil that’s processed into a wax-like solid. It’s frequently blended with other waxes to improve hardness and performance.
4) Do all candles contain paraffin?
No. Many candles use soy, beeswax, coconut, rapeseed, palm, or blends. But paraffin is still extremely common in mass-market candles.
5) Where does beeswax come from?
Beeswax is produced by honeybees to build honeycomb. Wax used for candles usually comes from beekeeping byproducts like comb and cappings.
6) What is “vegetable wax” on a candle label?
It’s a vague label that usually means a plant-based wax (soy, palm, rapeseed, coconut, etc.) or a blend. It doesn’t tell you the exact plant or percentages.
7) Is palm wax sustainable?
It depends on sourcing. Palm wax can be made responsibly, but palm agriculture is linked to deforestation when poorly managed. Look for transparent sourcing (e.g., RSPO certification) if that matters to you.
8) What wax burns the cleanest?
There’s no single guaranteed answer. Many users find beeswax, soy, and coconut blends burn cleanly, but soot depends heavily on wick size, fragrance load, drafts, and candle quality.
9) Can candle wax be vegan?
Yes. Soy, coconut, rapeseed, sunflower, and palm waxes can be vegan. Beeswax and tallow are not vegan.
10) Why do some candles say “soy blend”?
Because the candle contains soy wax mixed with other waxes (often paraffin or other vegetable waxes) to improve scent throw, appearance, or burn performance. The exact ratio is not always disclosed.
Final Thoughts
Candle wax can come from petroleum, plants, bees, or animal fats, and each source has tradeoffs. The best move as a buyer is to match the wax type to what you actually want — stronger scent, cleaner look, longer burn, vegan ingredients, or lower environmental impact — and then choose brands that are transparent about what’s inside.


.jpg)