
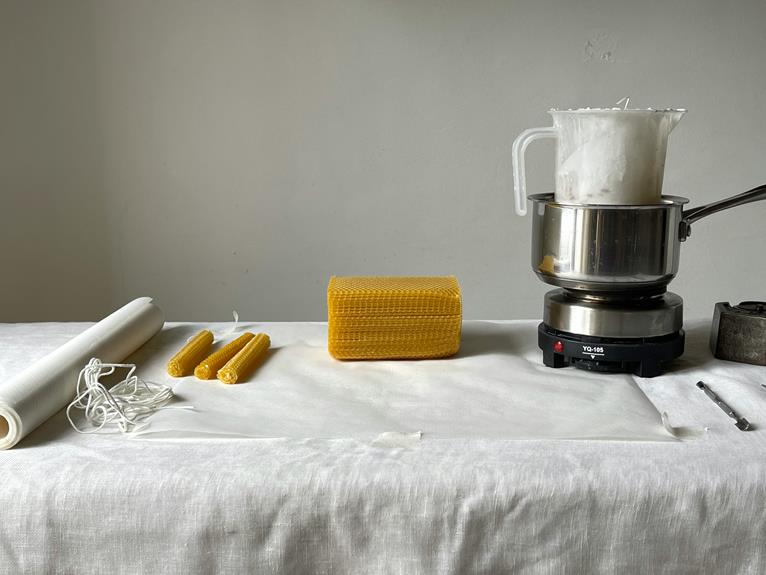
You'll start by gathering essential materials like beeswax pellets, wick, and melting pot, keeping them within easy reach to avoid clutter. Designate a safe area for the melting pot and keep your workspace clean and well-ventilated. Melt the beeswax pellets over low to medium heat, monitoring the temperature to reach 180°F to 190°F. Remove any debris and stir occasionally for even heating. Prepare your candle mold by cleaning and applying a release agent, then add color and scent to the melted wax. As you create your wick assembly and pour the wax mixture, you'll be one step closer to illuminating your space with your very own beeswax candle – and you're just getting started.
Key Takeaways
- Gather necessary materials, including high-quality beeswax pellets, wick, melting pot, colorants, and fragrance oils, and keep them within easy reach.
- Melt beeswax pellets in a heat-resistant pot over low to medium heat, monitoring temperature and removing debris for a smooth, even consistency.
- Prepare the candle mold by cleaning and applying a mold release agent to ensure the candle will release easily and prevent debris.
- Add color and scent to the melted wax using dye chips or powders and fragrance oils, following manufacturer's instructions and considering ambiance and pairing.
- Pour the wax mixture into the prepared mold, filling it to the top, and use a thermometer to verify the ideal pouring temperature of 180°F to 185°F.
Gathering Essential Materials
Gather all the necessary materials, including beeswax pellets, a wick, melting pot, colorants, and fragrance oils, to facilitate a smooth and successful candle-making process.
You'll want to prioritize wax quality, as it directly affects the candle's burn time, texture, and overall appearance. Look for high-quality beeswax pellets that are fresh, clean, and free of impurities.
When it comes to tool organization, keep all your materials within easy reach to avoid clutter and confusion.
Designate a specific area for your melting pot, and make certain it's heat-resistant and safe. You'll also need a thermometer to monitor the wax temperature, as well as a spatula and pouring pot for handling the melted wax.
Keep your workspace clean and well-ventilated, and consider investing in a wax paper or silicone mat to protect your work surface from spills and drips.
Melting the Beeswax Pellets
With your materials organized and within easy reach, you can now focus on melting the beeswax pellets in your heat-resistant melting pot. Place the pot over low to medium heat, and add the beeswax pellets.
Monitor the wax temperature closely, which should reach around 180°F to 190°F (82°C to 88°C) for perfect melting.
As you wait for the pellets to melt, inspect their quality. High-quality pellets will melt evenly and consistently, resulting in a smooth, consistent wax pool.
If you notice any impurities or uneven melting, it may be a sign of low-quality pellets. Remove any debris or sediment that rises to the surface, as it can affect the candle's appearance and burn quality.
Stir the melting wax occasionally to facilitate even heating. Be patient, as the melting process may take around 10 to 15 minutes, depending on the quantity of wax.
Once the wax is fully melted and reaches the desired temperature, you're ready to proceed to the next step. Remember to keep the melting pot away from children and pets, as the hot wax can cause burns.
Preparing the Candle Mold
Prepare your candle mold by making certain it's clean and dry. This is vital to prevent any debris or residue from affecting the quality of your candle. Use a soft cloth or paper towel to wipe down the mold, paying attention to any crevices or intricate designs.
If you need to remove stubborn residue, try using a gentle mold cleaning technique like soaking the mold in warm soapy water or using a specialized mold cleaning solution.
Once the mold is clean, it's time to apply a mold release agent. This will guarantee that your candle will release easily from the mold once it's set. You can use a commercial mold release spray or simply dust the mold with a thin layer of cornstarch or talcum powder.
Make sure to cover the entire surface, including any intricate details or textures.
With your mold properly prepared, you're now ready to pour in the melted wax and create your beeswax candle.
Adding Color and Scent
You can add a personal touch to your beeswax candle by introducing color and scent to the melted wax.
This is where you get to be creative and make your candle truly unique. When it comes to color, you can choose from a range of options, each with its own meaning. For example, blue is often associated with calmness and tranquility, while red is linked to energy and passion.
You can add color to your wax using dye chips or powders, making sure to follow the manufacturer's instructions.
When it comes to scent, you'll want to choose a fragrance that complements the color of your candle. This is known as fragrance pairing. For instance, a lavender scent pairs well with a soft purple color, evoking feelings of relaxation and serenity.
You can add fragrance oils to your melted wax, but be sure to use the right amount, as too much can affect the burn quality of your candle.
Creating the Wick Assembly
As the color and scent of your beeswax candle take shape, you must prepare the wick assembly, a vital component that will bring your creation to life.
The wick assembly consists of the wick itself, attached to a wick tab or sustainers.
When selecting a wick, consider the length and material. Wick length considerations are essential, as a wick that's too short won't burn efficiently, while one that's too long can cause the flame to flicker. Aim for a wick that's about 1/4 inch shorter than the height of your candle.
For wick material options, you can choose from cotton, paper, or another synthetic material.
Cotton wicks are a popular choice for beeswax candles, as they provide a clean, steady burn.
Paper wicks, on the other hand, create a more rustic, textured flame.
Synthetic wicks are a good option if you're looking for a more consistent burn.
Once you've chosen your wick, attach it to the wick tab or sustainers, making sure it's centered and secure.
This will guarantee a stable flame and a beautifully burning candle.
Pouring the Wax Mixture
Pour the melted wax mixture into the prepared mold, making sure to fill it to the top to avoid air pockets. The ideal wax temperature for pouring is between 180°F and 185°F. If the wax is too hot, it can burn or discolor the mold. If it's too cold, it won't pour smoothly. Use a thermometer to verify you're within the recommended range.
When pouring, use a steady, gentle flow to prevent air bubbles from forming. Hold the pouring pot close to the mold to minimize splashing. You can also use a pouring technique called 'layer pouring,' where you pour the wax in a circular motion, starting from the center and working your way outwards. This helps to eliminate air pockets and creates a smooth, even surface.
As you pour, make sure the wax covers the entire wick assembly. Use a spatula or spoon to remove any air bubbles that form on the surface. If you notice any wax accumulating at the top of the mold, use a paper towel to gently absorb the excess. Now, let the wax cool and harden completely before removing it from the mold.
Frequently Asked Questions
Can I Reuse Beeswax From an Old Candle to Make a New One?
You can reuse beeswax from an old candle, but check its quality first. If it's pure and hasn't been contaminated, it's good to go. Be aware that different waxes have varying melting points, so make certain you're mixing compatible waxes for a successful new candle.
How Do I Prevent Air Bubbles From Forming in the Candle?
To prevent air bubbles, you'll want to guarantee wax clarity by melting it slowly and evenly, maintaining melt control by stirring occasionally, and pouring the wax into the mold at the right temperature.
Can I Add Herbs or Spices to the Melted Wax for a Unique Scent?
You can definitely add herbs or spices to the melted wax for a unique scent, but be cautious when using essential oils, as they can be potent – consider fragrance blending to achieve your desired aroma.
What Is the Ideal Temperature for Storing Beeswax Candles?
You'll want to store your beeswax candles between 60-70°F (15-21°C) to prevent wax degradation. Avoid extreme temperatures, humidity, and direct sunlight to maintain their quality and guarantee a longer shelf life.
Are Beeswax Candles Safe to Use in Outdoor Spaces or Near Open Flames?
As you step into the great outdoors, don't let your beeswax candle's warm glow be a ticking time bomb; be aware of outdoor risks and flame hazards, ensuring a safe distance from open flames to prevent a wildfire.
Conclusion
As you've carefully tended to each step, your beeswax candle begins to take shape, a warm and inviting beacon waiting to illuminate your space.
Like a masterpiece unfolding, the soft glow of your creation will soon fill the air, a reflection of your patience and skill.
With every flicker, you'll be reminded of the joy and satisfaction that comes from crafting something with your own hands.